
Is recording acoustic instruments becoming a lost art? Many new music producers and engineers would prefer to manipulate MIDI or even utilise AI over something truly daunting – actual recorded audio!
Fear not, recordists! Here is a guide to get you feeling more at ease with the unrivalled organic sounds of acoustic instruments.
Choosing a Recording Environment
Let us begin with your space. Is it suitable for recording? Do you like its sound for your project? There’s an easy test – speak to your room!
Your own voice should be very familiar to you. A quick chat with yourself will give you a sense of your room’s qualities.
Here are some key elements to listen out for:
Reverb – Are you getting delay or a quick bounce? Do you want that bounce in your recording?
Spill – Is your voice clear in the space? If another person speaks, do your voices blend or can they be heard individually?
Tone – Is the room bright with quick-reflecting surfaces? Or is it muted with carpets and curtains?
Many recording artists prefer a neutral recording space to allow more control of elements like delay and reverb in the post-recording process. In this case, recording in an acoustically treated space will be essential.
Selecting the Right Microphone
The right microphone is crucial for achieving good recording results. For acoustic instruments, you will want to find a quality condenser microphone. Condenser mics are often preferred due to their sensitivity and accurate high-end response. More specifically, small-diaphragm condensers are more effective at picking up fine, top-end detail and quick transients.
Large-diaphragm condensers, on the other hand, are selected for their fuller mids and lows and typically have lower self-noise than small-diaphragm condensers.
Dynamic mics, while less sensitive, are still useful, particularly for powerful instruments like saxophones, and for recording electric guitar amps and bass drums, where their robustness and ability to handle high SPLs are beneficial.
You should understand the direction where your mic picks up sound, otherwise known as its polar pattern. Using an omnidirectional mic can help capture sound consistently from all directions, which is useful if the room acoustics are favorable. However, directional mics like cardioids are often preferred for their ability to focus on the source while reducing room noise.
Ultimately, the choice of equipment should be tailored to the specific characteristics of the instrument and the desired sound, with an emphasis on experimentation and critical listening to ensure the best possible recording.
Mic Placement: Where to Begin
When recording any unfamiliar instrument, achieving a high-quality sound can be challenging. Start by avoiding close-miking with a single microphone, as this often fails to capture the full sonic character of the instrument. Instead, position the microphone at a moderate distance to capture a balanced sound while minimizing excessive room ambiance.
Begin by identifying the main sound-producing parts of the instrument and the primary direction of sound projection. For example, with an acoustic guitar, the sound largely emanates from the vibrating body, and placing the mic at a distance equal to the body’s length can provide a balanced capture. Adjust the mic direction to aim centrally at the sound source.
Consider room reflections as well. A larger distance between the mic and the instrument increases the influence of the room, potentially adding unwanted coloration to the recording. Experiment with mic height and placement to minimize these reflections, ensuring a clear and accurate sound.
Specific Instrument Placement
For capturing the best sound from acoustic instruments, careful mic selection and placement are essential. Listed here below are good starting mic positions for recording specific popular acoustic instruments.
These initial mic positions provide a strong foundation for capturing the authentic sound of each instrument.Keep in mind that initial positions usually need to be adjusted! Listening and adjusting are key to any good recording.
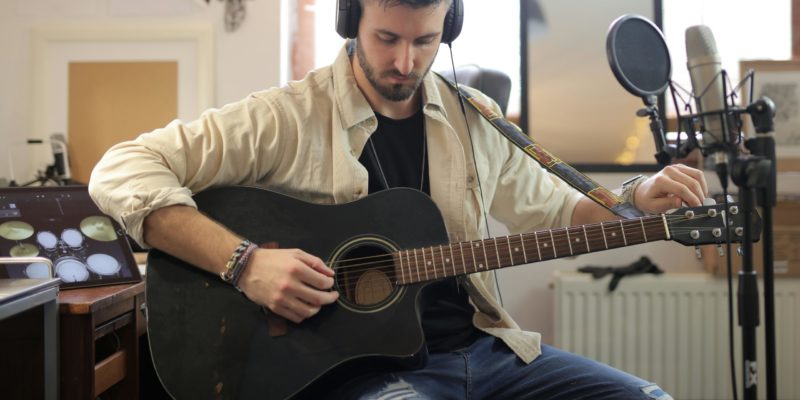
Acoustic Guitar: Use a condenser mic. Start by positioning the mic around 12-18 inches from the guitar, aiming at the point where the neck joins the body or at the bridge. Avoid the soundhole to prevent a boomy recording.
Other Stringed Instruments: Place the mic at a distance equal to the length of the instrument. Fine-tune the position to capture a balanced sound.
Flute: Position the mic above the instrument, midway along its length, to capture sound from the mouthpiece, open end, and fingering holes. Use a condenser mic for a natural sound.
Trumpet: Aim the mic at the bell from a distance equal to the bell’s diameter to capture the primary sound projection.
Drum Kit: For a live sound, use a pair of mics placed 3-6 feet from the kit. Space them about 3-5 feet apart, and adjust based on room acoustics. For individual drums:
Kick Drum: Place a dynamic mic about 8 inches from the beater inside the drum.
Snare Drum: Position a dynamic mic 2 inches from the edge of the drum and 2 inches above the head.
Toms and Hi-Hat: Place dynamic mics close to the drum heads, around 8 inches above for hi-hats.
When to Use More Than One Microphone
Using multiple microphones on a single source can enhance your recording but requires careful handling. For acoustic guitars, a secondary mic positioned at the neck’s center, about 12-16 inches away, can add richness. For drums, use stereo overhead mics to capture a live feel, with additional mics on the kick and snare for better balance.
However, using multiple mics can introduce problems, particularly in untreated environments. Ensure each mic serves a specific purpose, such as capturing additional tonal qualities or room ambiance.
Always listen critically to each mics contribution to the overall sound. Start with a single mic and only add more if they provide a clear benefit. This method helps avoid cluttered mixes and ensures that each mic improves the final sound quality.
Header Photo by Andrea Piacquadio.