
We previously touched on compression in an earlier guide, and explored how it’s used to help a mix sit together better. However, compression can only do so much. EQ (or equalisation) is another of the most used (and most important) processes you need to learn to create professional mixes.
Compression allows you to reduce the dynamics of the audio, so that, for example, when the kick drum and bass play at the same time, the overall level isn’t too loud. Equalisation is the same idea, but for frequencies. If your kick drum and bass both occupy the same frequency range, they will be fighting for the space available, and conflict with each other. This results in a muddy mix. What we can do is equalise both tracks so that the kick drum emphasises the higher bass frequencies, whereas the bass guitar can occupy the lower range. Doing this lets each element have it’s own space in the frequency range, helping the mix sit ‘right’.
Types of EQ
There are many types of EQ, but they all work in the same way. They either increase or decrease the signal’s level in a pre-determined frequency band.
Low Pass / High Cut – Only allows low frequencies through, removing all high content.
High Pass / Low Cut – Only allows high frequencies through, removing all low content.
Low Shelf – Reduces the level of lower frequencies, but not remove them completely.
High Shelf – Reduces the level of higher frequencies, but not remove them completely.
Band Pass – Only let through frequencies in the specified band.
Band Reject – Completely remove the signal in the band.
Peak / Bell – Increase or decrease the level of a specific band of frequencies.
Most EQ units allow you to chain multiple types of EQ together – for example, you might use a low shelf, a high cut, and a peak on the same signal to sculpt the sound as you want.
When setting an EQ, you will have 2 or 3 settings for each band. A frequency, a gain, and in some cases a width. The frequency parameter sets what frequency the EQ is centred on, the gain sets the amount of boost or reduction, and the width parameter sets the size of the frequency band. Cut, pass and shelf EQ types don’t have the width parameter, only the corner frequency.
Types of EQ Units
Not all EQ units operate in the same way. There are many types of equaliser modes available, from basic 2-band, to massive multi-bank arrays with dynamic operation.
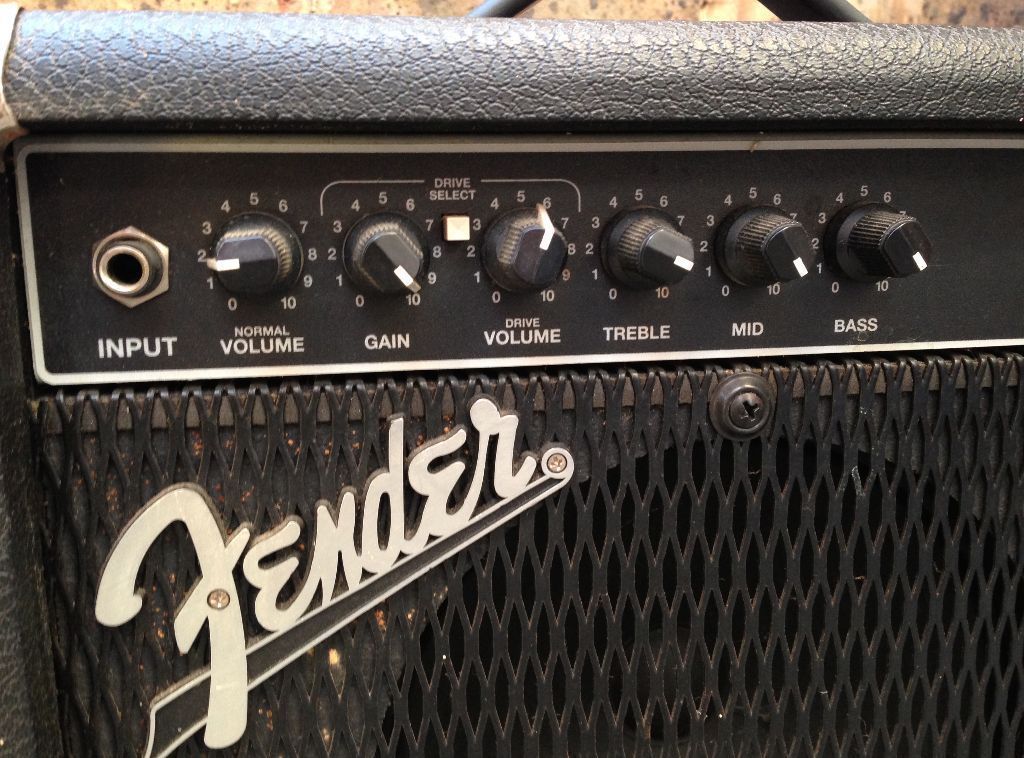
Fixed equalisers are the one that most people are aware of. They have a handful of bands that are fixed in frequency, and each knob adjusts the level of the frequencies in that band. You see these on everything from hi-fis and car stereos, to budget mixers and guitar amps. This Fender amp allows you to adjust the bass and the treble frequencies independently, but you get no other choice of modes or frequencies.
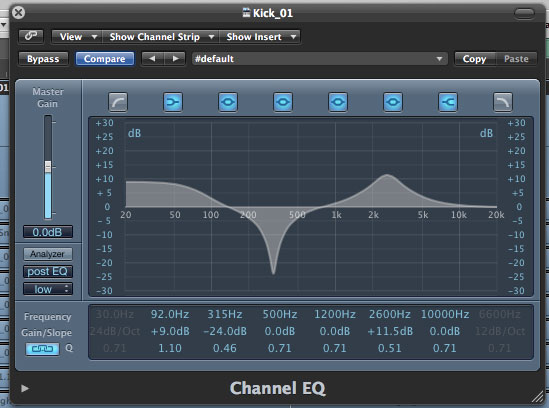
Parametric equalisers are the most versatile and common equaliser type for producers. Parametric EQ allows you to set multiple different EQ bands, with different EQ types, frequencies and gains. These type of equalisers let you sculpt the sound with total precision, and usually offer multiple bands. This example shows Logic Pro’s built in parametric equaliser.
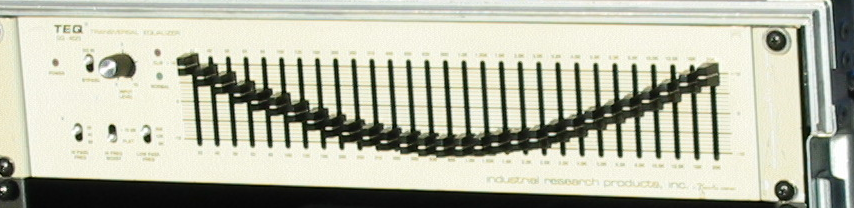
Graphic equalisers consist of a bank of sliders that each control a separate frequency range. These type of equalisers are often used in live sound situations to allow the engineer to quickly adjust the sound to compensate from the speakers and the environment.
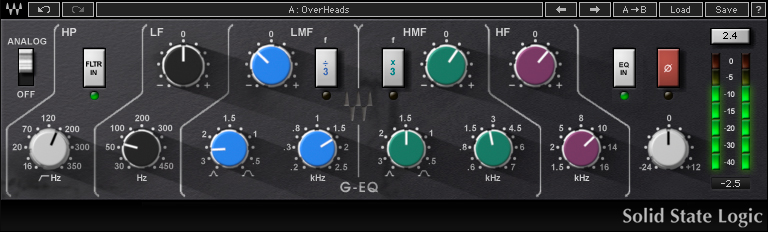
Semi-parametric equalisers are what a lot of the old recording gear used. They are similar to fixed EQ in that you only get a set number of bands, however they allow you to adjust the frequency and width of the bands. Many analogue modelled VST plugins work this way, and some of the old gear has exciting and ‘warm’ non-linear sounds that you don’t immediately get with digital.
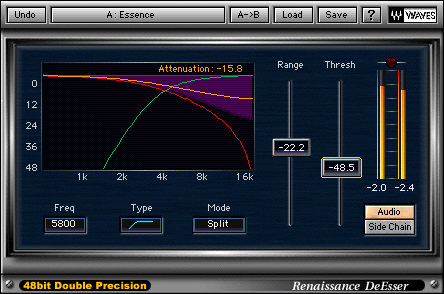
Dynamic EQ is slightly different to the other EQs, in that the gain of the EQ is not steady – it rises and falls with the level of the incoming audio. De-essers basically work in this way. If the EQ unit detects sibilance (i.e. a loud peak in a certain frequency band), then the equaliser pulls down the level of that frequency.
An EQ Example
Lets use the lead vocal example from the compression guide. We got the level of it sitting nice, but it doesn’t quite sit right in the mix. It sounds a bit ‘muddy’ and isn’t as clear as it could be. As a female vocalist won’t be singing in the very low frequencies, we can cut off all the signal below 200Hz with a low pass filter. This will remove any low frequency content we aren’t concerned about, such as background noise.
Now take a peak band, set it to about 3Khz, and add +3dB of gain. If we play with the frequency, and the bandwidth, we will hear different parts of the voice become more prominent. Keep tweaking until you find the frequency that pops out the best for the vocal. This is our ‘sweet spot’ where the vocals pop out of the mix, and boosting this frequency can add clarity to the vocal in the mix.
Rather than boosting the vocal track, we can cut another instrument in the same frequency range. Say the song is a female vocal and piano, we can add a peak band eq to the piano with the same frequency as the vocal EQ, but set it to -3dB. Using the EQ on the piano track in this way has effectively made space in the frequency range for the vocal, rather than forcing the vocal frequencies up.
EQ is a powerful tool in the producers toolchain and can help make or break a mix. It may appear a little daunting at first, however it’s not too complicated. As with most things in audio, the golden rule is Always Use Your Ears!